
Pc assembly and its operation.
Here you will follow the steps below to manually assemble your favorite desktop computer hardware components.
If you follow all the steps given below completely in a sequential manner. So you will be able to create a desktop computer yourself.
So let’s move on to doing it the proper way.
PC assembly and operation.
To assemble or build a personal computer, you must have the following hardware components or parts of a personal computer, or desktop computer.
- 1 personal computer cabinet case.
- 1 SMPS unit/or main power supply.
- 1 Microprocessor and CPU.
- 1 4 or 8 gigabytes of primary memory RAM.
- 2 or 3 SATA cables.
- 1 Latest Modern 11th Generation New Desktop Mother Board.
- 1 Latest Microprocessor CPU.
- CPU cabinet front and rear heat out fan.
- 1 hard disk SATA/HDD for secondary data storage.
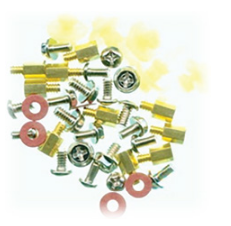
- CPU cabinet, motherboard, SMPS, external, internal device components for mounting screws.
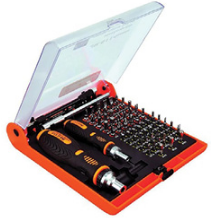
- Power Tools / Screw Driver Set.
- 1 keyboard device.
- 1 mouse input device.
- 1 Crt/Lcd/Tft/Plasma, Output Device Monitor.
- Printer (Not Necessary).
- Must have 1 bootable Windows, Linux, Mac, Android operating system, DVD, or bootable pen drive. After completing all the steps of PC assembly, you will have to manually install the operating system and applications for a graphical system environment.
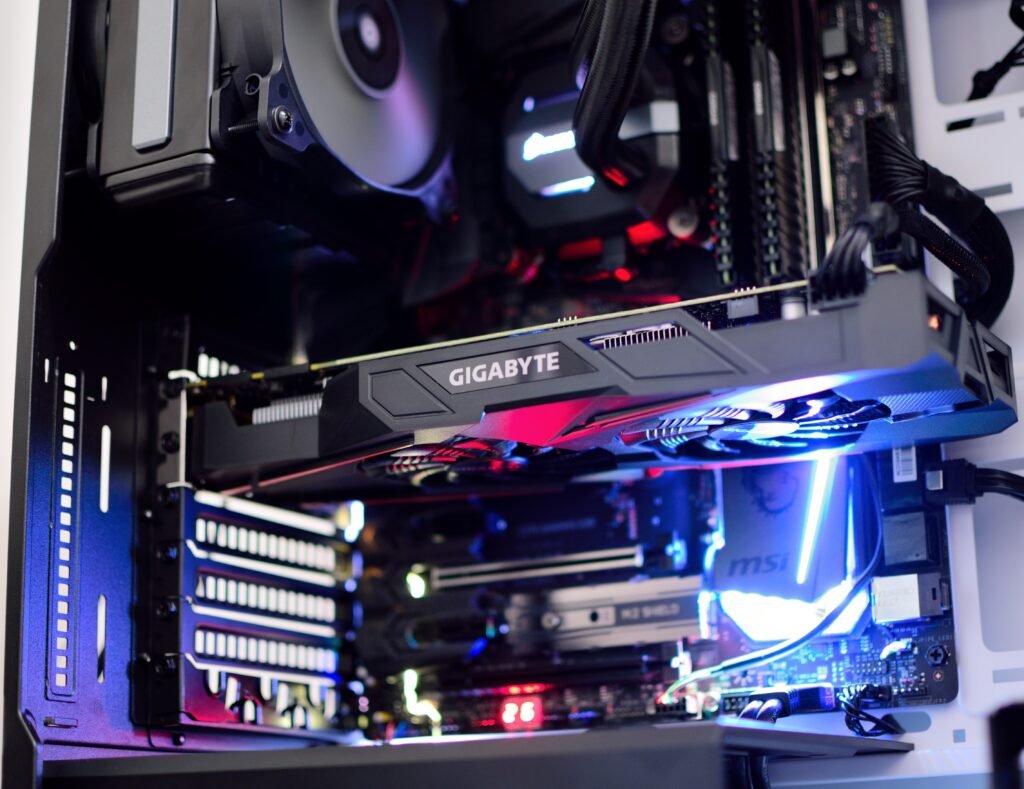
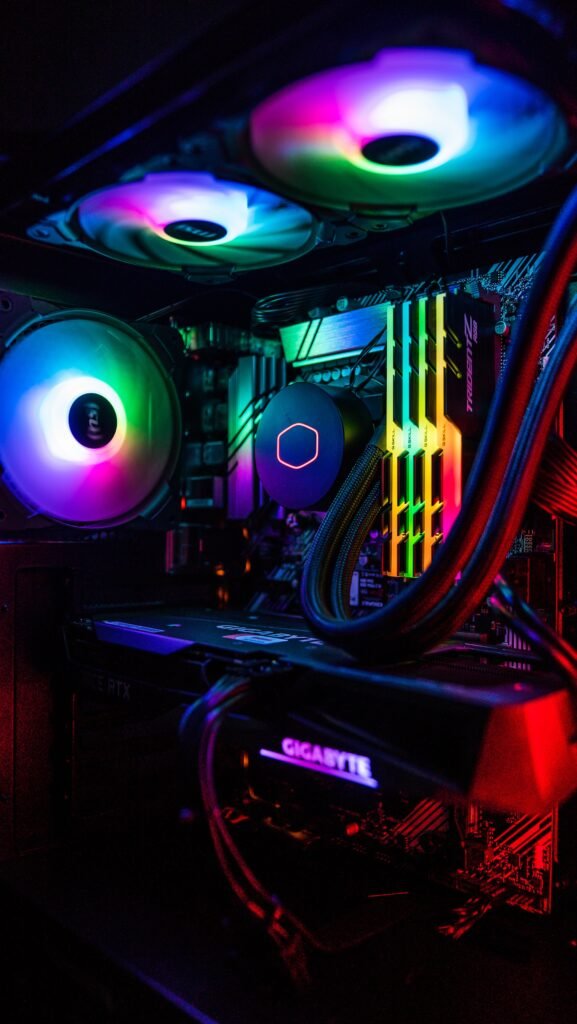
Assembly PC Various Parts – Assembling PC refers to the design/construction of a computer-based on the raw computer hardware component equipment. Where PC assembling involves installing all the computer required components at the proper location at the given location at various component locations in the computer cabinet. Here the PC installation process consists of a Microprocessor(CPU), SMPS (Main Power Supply), RAM (Primary Memory), Secondary Storage(SATA/HDD Storage), Graphics Card (GPU for Better Gaming Environment), Bios, Heatsink, Front and rear fan, including proper installation of the components. which is similar to another component in the category of assembling all PC component parts.
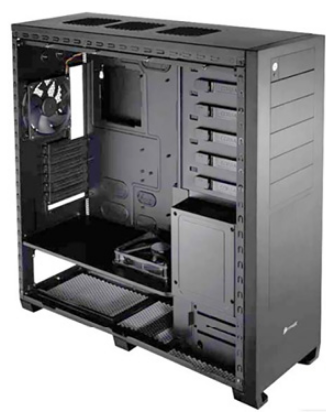
Open Computer Cabinet Case – Where in the PC assembling process you first buy a computer cabinet/case. And all necessary computer motherboards and other hardware components devices are properly mounted with screwdrivers in the hole locations. Manually screw them in correctly until they fit snugly into the cabinet screw bottom position. Remember here, if you have the right skills in assembling computer hardware components. So you know how to do it properly. But if you do not have any skill or expertise in PC assembling. So do not try it unless someone guides you through computer assembling steps.
These are the steps involved during PC desktop cabinet installation.
- Any computer from any company Buy 1 new cabinet/case.
- Now open the left, right, cabinet front cover to install the computer motherboard in it. Now select the proper hard disk, optical drive, motherboard, SMPS, and other hardware/media devices to be installed.
- Here you can see all the given screw positions correctly in the computer cabinet case.
- Now here in the computer cabinet, all the computer peripheral devices are all ready to be installed properly in the computer cases.
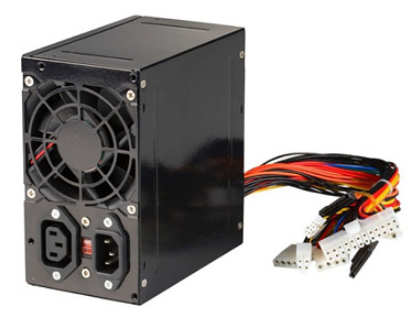
SMPS Installation – The SMPS is the main power supply device that supplies power to a desktop computer. Where it installs and supplies power to all the necessary hardware components of the computer SMPS on the computer cabinet case with electrical power. Most of the present time you get SMPS already installed in the CPU cabinet. But here we will do it manually. First of all, you should buy Ac 230 Watt SMPS Power Supply. Now mount it well from all four sides in the current cabinet with screws instead of SMPS. Tighten it until it fits. Now you can manually plug individual SMPS power supply connector supplies onto individual motherboard components. Where in the SMPS plug the 24 pin ATX connector into the ATX connector. Simultaneously install the 4 pin CPU power connector. Even you can install an additional 4 pin HDD, optical device power connector same all other SMPS connectors can be added in the proper place.
Steps Involved During Power Supply (SMPS) Installation.
- First, you open the cabinet case cover.
- Here you place the power supply at the exact location with the SMPS screw mount hole position in proper hole align hole margin position.
- Now screw the SMPS on properly until it fits into the cabinet.
- Now you can manually install all SMPS power supply connectors with motherboard connectors.
- You can now plug the SMPS power cable into the main power supply (home/office) to start the power button.
- Now you start the computer and see the display on the desktop, if everything is fine, it means that your SMPS installation process is correct.
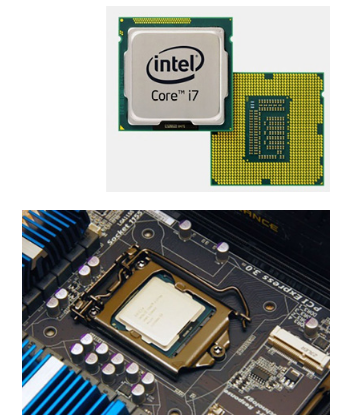
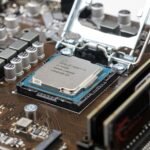
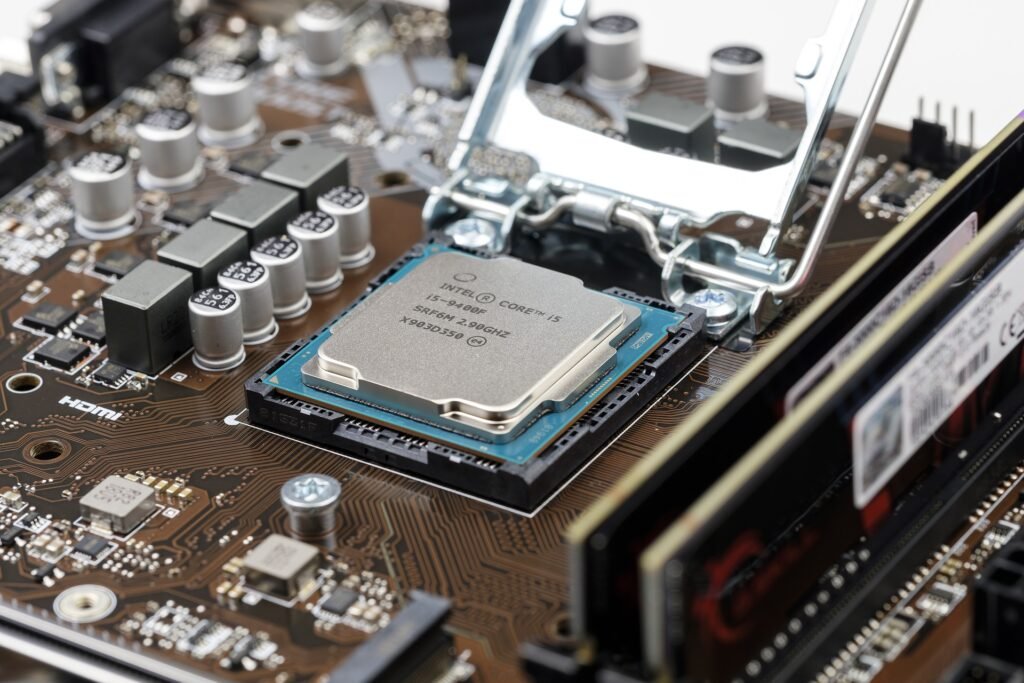
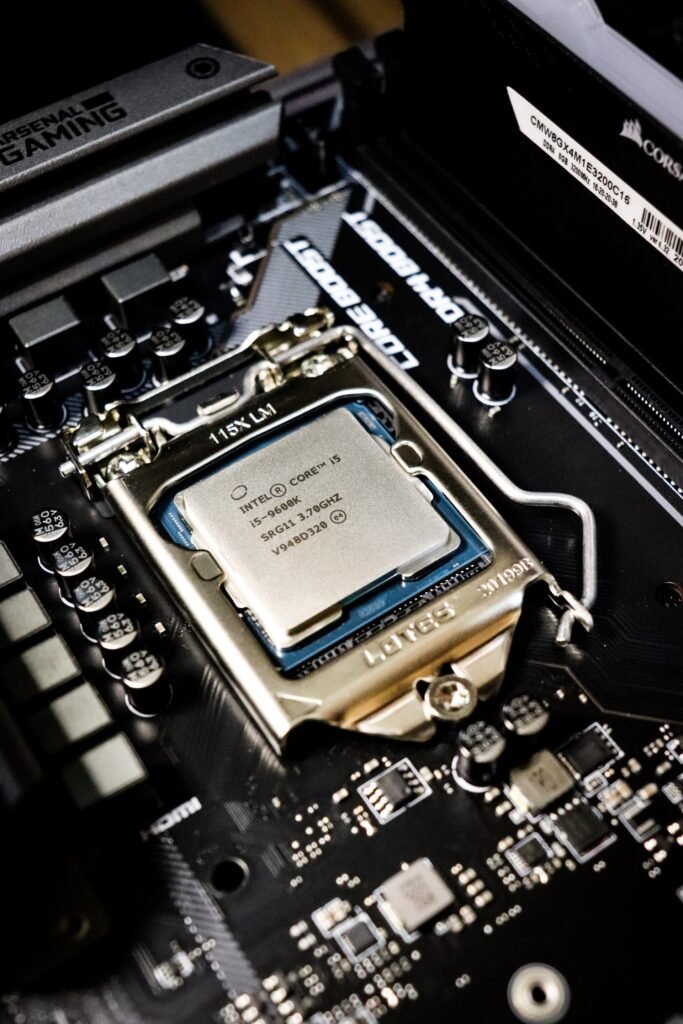
Microprocessor (CPU) Installation – The microprocessor CPU is the main data and information processing component in computer processing. Where the microprocessor does all the computer processing and calculation-related work. Even all the routine tasks of the computer which are performed by the CPU itself. For this, we can say that it is the main computer component. Before you install the CPU here, be careful to protect the CPU and motherboard from electrostatic discharge, and wear a strap on the wrist of your hand to prevent any microprocessor electronic damage.
Microprocessor installation process.
- First, you buy a new generation Intel/AMD company’s new microprocessor.
- Remove the microprocessor cover.
- Now you carefully locate the microprocessor location on the motherboard in the CPU socket.
- Nowadays company manufactures ZIF (Zero Insertion Force) motherboard CPU sockets for all modern motherboards.
- Place the CPU in the Gif CPU socket with the alignment notch properly in place.
- Now properly down the CPU Load Lever Retention tab, and install it properly.
- Now put a small amount of thermal compound on the microprocessor, spread it well around the microprocessor. Where it keeps your CPU cool, or maintains the microprocessor temperature heat level during long/heavy duties.
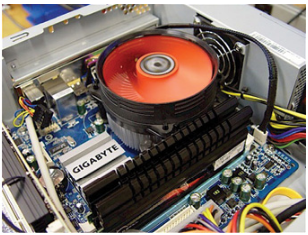
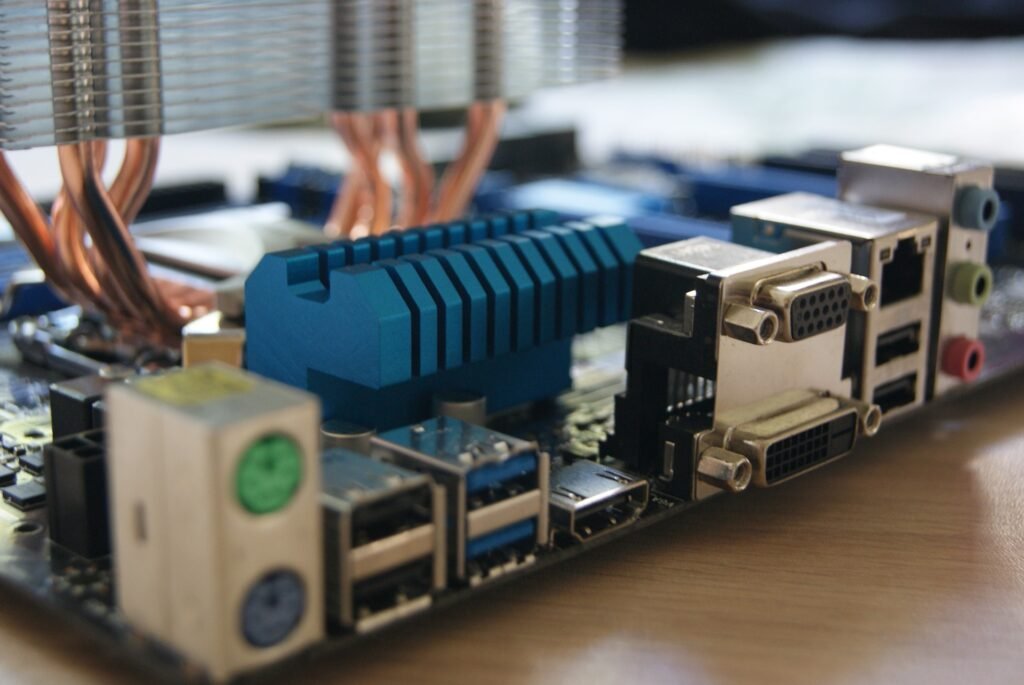
Heat Sink Installation – After microprocessor CPU installation now it’s time for the heat sink or CPU fan installation. Here you get a new heat sink fan with the microprocessor purchased, or already properly screw with the processor. Now connect the heat sink fan power connector to your computer motherboard connector. Here you see all its connection points and locations properly and connect them to the fan connector on the motherboard. Then start the computer and test it to check or confirm the installation of the CPU or heatsink on the microprocessor.
Heat sink/fan installation process.
- Here you open the heat sink fan cover.
- Properly mount the microprocessor fan to the microprocessor or CPU location.
- Simultaneously, fix the screw at the location of the microprocessor from all sides.
- Now properly connect the heat sink/fan connector to the motherboard heat sink connector.
- Check if the heat sink fan is running with power on. If working properly, it means that the CPU heat sink installation was successful.
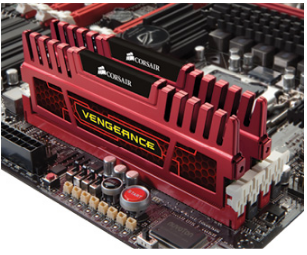
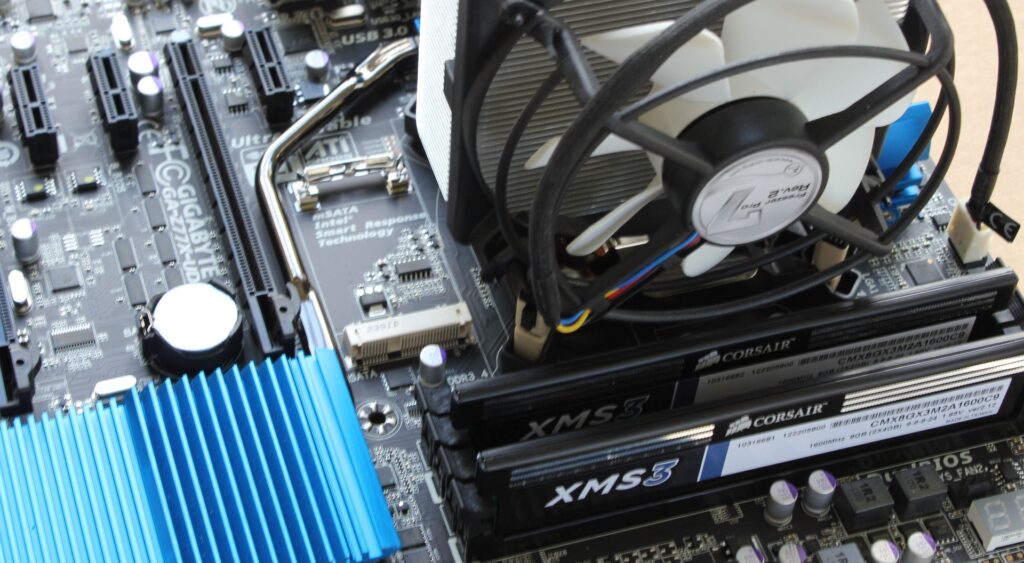
Memory/RAM Installation – RAM is the primary storage of data and information stored in your system, making the installation of Random Access Memory mandatory. When the computer is started in the switched on mode. So here RAM plays an important role in computer performance and system primary data storage and retrieval. Therefore, we can say that RAM stores data and information temporarily. Where it means that, when the power supply is turned off, it releases or removes all the information stored in it.
Steps are involved during RAM installation.
- Buy DDR3 or DDR4 modern version RAM modules as per your requirement. Here you should make sure in advance which RAM model your current motherboard supports, and open it correctly and install it correctly.
- Now place it properly according to existing Mother Board Ram Slot to Dim RAM Module Slots. And in the given RAM module slot, check the RAM slot and fit it correctly.
- Now barely press the RAM module into the dim slot. Unless it automatically locks itself properly in the motherboard slot.
- Properly install the RAM module in the motherboard RAM dim slot.
- Start the computer and see the RAM installed in the bios, it is not showing or showing on the RAM dimm slot. You can also do this process at the end.
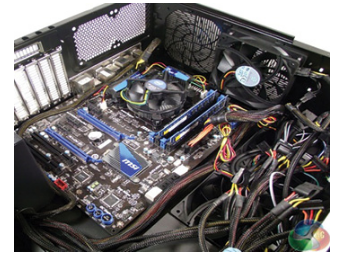
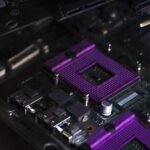
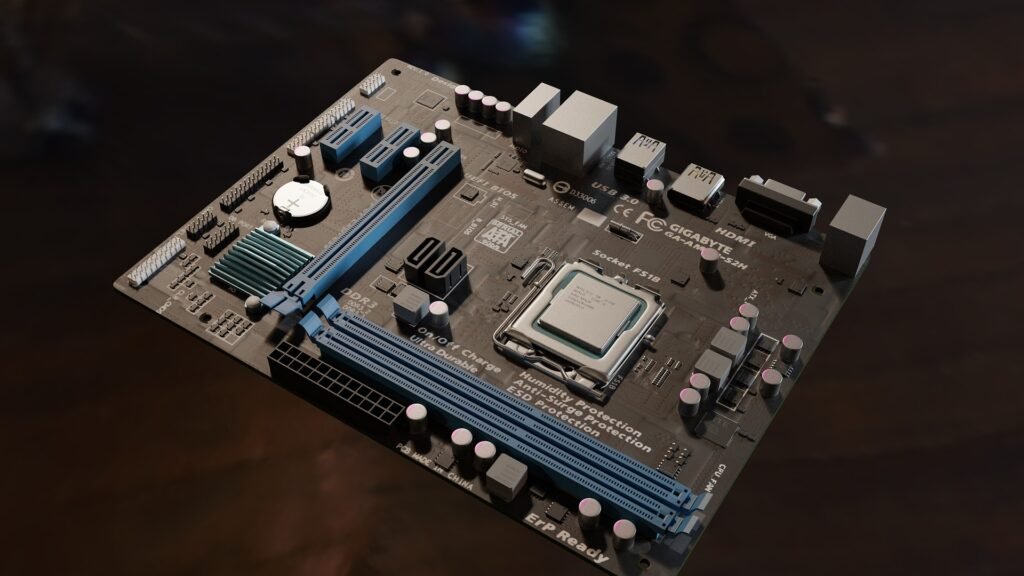
Motherboard Installation – The motherboard is the most common or important hardware component in computer cases. that operates and handles all computer processing, system logics connectivity, and hardware-software activities. Some common motherboards are divided into two parts. And they are known as Northbridge and Southbridge, both sides of which separate motherboard components work together. and generate single successful output based on the user’s input request. Here you always have to remember that, each component works together during the exchange of desired information and information material while communicating or exchanging some information with the computer motherboard South and North bridges.
Steps of the Computer Motherboard Installation Process.
- Here you can buy any motherboard of the latest generation computer motherboard category at present.
- Now you open the cabinet case and properly mount the motherboard and the screw holes of the cabinet.
- Now properly match all the side cabinet holes with the motherboard holes.
- Now put a plastic or paper cover on the motherboard installation below any power grounding. This will prevent grounding in your current installation motherboard.
- Now place the motherboard properly in the computer cabinet and align all the cabinet and motherboard holes in the same proper position.
- You can now screw in all the motherboard screws with the screwdriver until they are fully tightened. And can move or drag the board to check the screw fitting.
- If you have installed or tightened all motherboard screws properly. So the motherboard installation was successful in your cabinet.
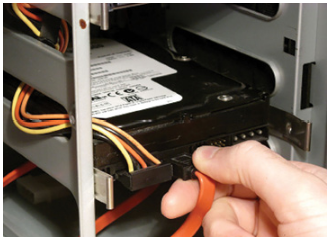
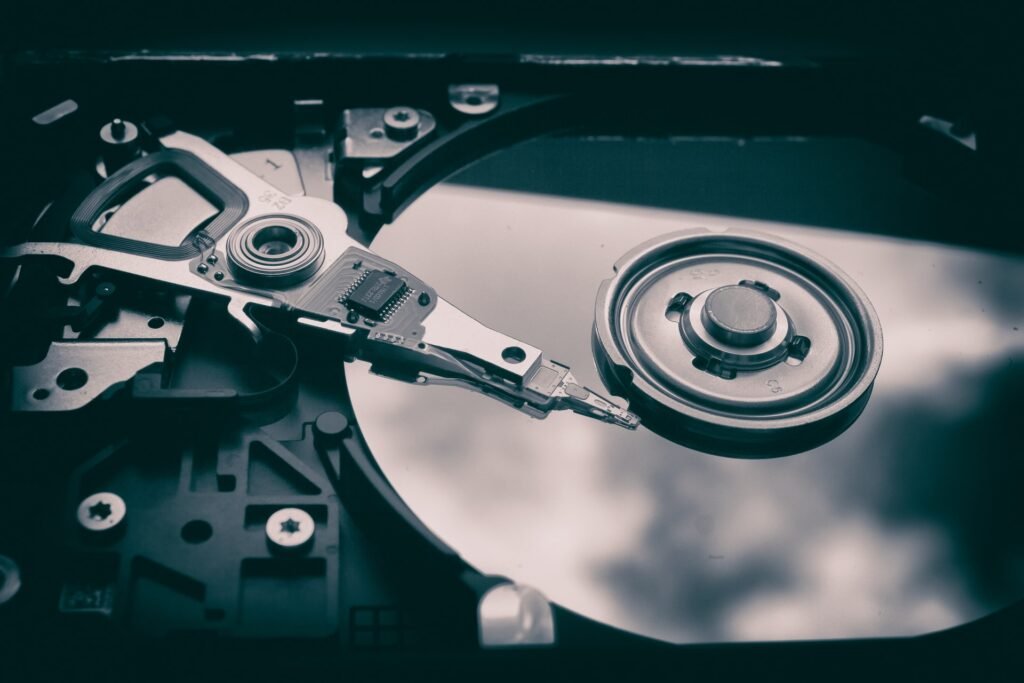
Hard Disk Installation – Here hard disk is a popular and important secondary storage fixed media device on a computer. Where you are used to storing a file, folder, image, graphic, text, audio, video, multimedia object, program, project, and any secondary computer data and information in the installed hard disk. So that any software application can visualize an object to be treated electronically. Even the hard disk stores all the information of a permanent nature. Where it stores the information till then. Unless we manually remove or clear this information from its storage location.
Hard Disk Installation Process.
- Here you can buy any SATA/SCSI/western digital hard disk of any other company of your choice.
- Now you install the hard disk properly in the computer cabinet. Now you see the empty slot position in the cabinet case, and install the screw in the hard disk HDD.
- Now you can put all the screws in the correct position to install the hard disk, and screw it to align to the proper tight hard disk from all sides. If hard disk installation is not proper here, it can destroy or damage your hard disk as well as motherboard components.
- Now properly connect the SATA and power cables to the power supply and to carry data and information between the HDD and the computer motherboard components.
- Now the hard disk installed in your personal computer was successful.
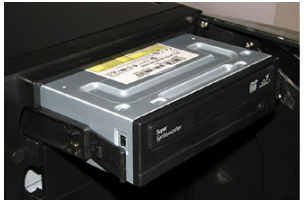
Optical Drive/DVD ROM Installation – Optical Drive includes floppy drive, CD drive, DVD ROM drive, and combo drive, hardware device installation in your personal computer. Where you can install one or more optical drives according to your purchase cabinet size mini or tower cabinet. It can even be a tower and mini-tower computer cabinets, in the tower cabinet you find several additional slots free to install additional optical drives and HDD components. Nowadays the company has stopped production of floppy and zip drives, and replaced them with more capacity than pen drives or flash/memory cards, in today’s environment even optical drives are obsolete. But it is still an important device for multimedia and video editing. Where they are used to read and write CDs, DVDs.
The following steps are involved during optical drive installation.
- Here you can buy DVD Rom, Zip Drive, Floppy Drive. and expose it.
- Now you place the optical device in the computer cabinet inside the slot provided.
- Even so you place the optical device properly in the cabinet slot, and align or tighten all the side screws according to the cabinet hole.
- Where you can tighten the screw with the screwdriver until it fits snugly.
- Now start the optical device testing on your computer. If the existing installed optical device works correctly, it means that its installation is correct, otherwise, you repeat the same process.
SATA Cable Installation – SATA cables are smaller in size, and carry more data and information faster than other older IDE cables. Where nowadays many company manufacturers only manufacture SATA cables for optical devices, HDD devices, and other storage media. Here you can buy SATA cables that connect spare hard disks, optical devices, zip disks, and other types of SATA port attaching devices. Which are used to store and share information on secondary storage devices.
Installation of SATA cables.
- Here if everything hardware is properly screw into the computer cases. So now it’s time to install the computer cable.
- Plug a SATA cable into the HDD drive from one side, and the other side of the same plug right into the motherboard located in the SATA port slot.
- Now you can check after SATA cable installation in the computer, whether everything is fine except SATA installation or not.
- Now start hard disk, optical drive, open HDD file folder, open optical drive contents, check, etc in computer to confirm secondary device installation.

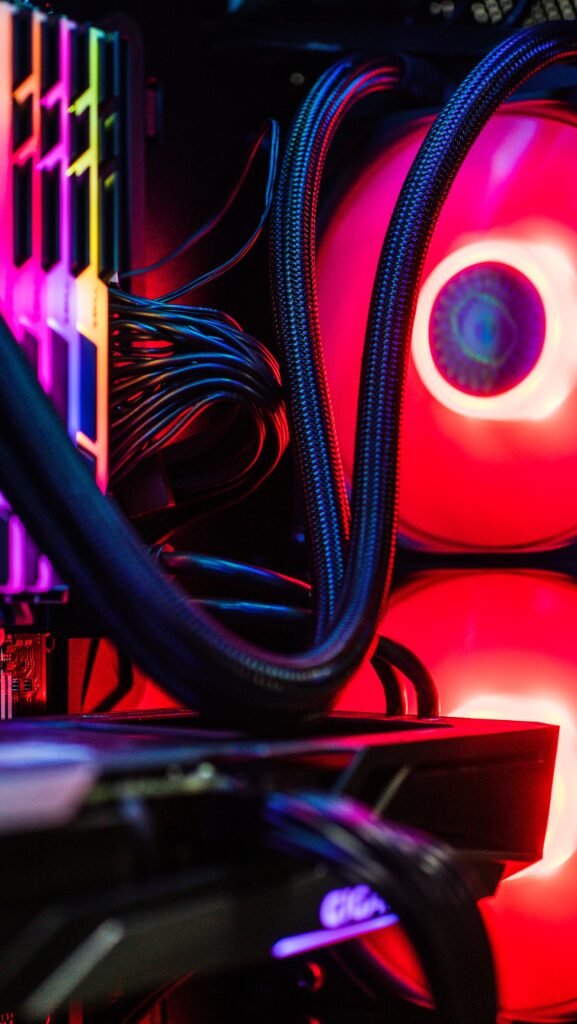
Rear Fan Installation – The computer is the rear fan controlling the temperature level. When the computer is working for a long time. So the motherboard components automatically heat up, and the heat released in computer cases is spread all over the cabinet. Therefore, it can be harmful to your motherboard and computer hardware components. Or other components of your computer motherboard may burn out on their own when they overheat. So, all you need to do here is install a cabinet rear fan. Where cabinet rear fans may be in one or two or more quantities of computers. Even these heat fans remove heat from the computer cabinet component and maintain the CPU cooling level while the computer is running continuously. Finally, here’s what if the cabinet fans are not working properly. This can damage or even burn the existing computer hardware components, critical hardware components of the computer cabinet.
Cabinet rear fan installation process.
- Buy Cabinet Rear Fan as per given Rear Fan Empty Fan Block.
- Now you can properly screw the position of the cabinet rear fan and cabinet mounting holes.
- Now you just screw them in the proper position until it is tightened or screw properly.

Screw installation – where the screw bounds perfectly properly to hold the hardware components. Here computer components include hardware objects such as motherboard, optical drive, HDD drive, SMPS, computer additional card slots, etc. Where each screw is designed for a specific purpose. That means, you see all the components having a separate screw. When you buy a computer from a cabinet company, they provide you with a free screw bag that holds a collection of different screws. Even you choose the exact level of the screw. which is required to fit into the computer case.
Screw Driver Set – A screwdriver is a collection of superset tools of various screw drive tools. When you choose one of them, even look at the screw top and decide which screwdriver is fitted on it. Now you can properly tighten the given screw to its orientation location.
Cable installation in computer.
Connect 24 Pin ATX Connector – Here you can install a 24 pin ATX power connector with a 24 pin power connector located on the motherboard. Here you find some motherboard sockets or slots with 20 pin connectors to the ATX 24 power connector placed on the motherboard. But nowadays most motherboard designers design new motherboards with 24 pin ATX connectors. Here you push the 24 pin ATX power connector into the motherboard located in the 24 pin ATX socket with hard or force. Here you can adjust the power connector lever, and give it a final touch. Now you start a computer motherboard check process, if all is well, that means, the installation of a 24 pin ATX connector in your motherboard is done properly.
Molex Power Connector – is a 4 pin molex power connector used to connect optical and external HDD media. Where you plug your HDD, DVD ROM, 4 pin molex into the available power socket with little or no force. Here you start the machine/or computer, and check the performance devices. If all is well, it means that the installation of Power Molex is proper, otherwise, you reconfigure it.
Connect data cables (STA/PATA) – where data cables carry data and information between the computer motherboard and other devices, and digital data and information between connected hardware components. here is the PATA (Parallel Advanced Technology Attachment) cable. Used in Pentium 3 types of computers, this plugin replaces the hardware components attachments on the master and slave ID slots on the motherboard. Here PATA cable comes in two types of categories, 40 pin,s and 80 pins use them according to better availability. Even SATA (Serial Advanced Technology Attachment) SATA cables are more commonly used in today’s computers to transmit data between small, thick, and bulky connected computing devices.
Connect USB cables – Some motherboard designers company two or more USB connectors built into computer motherboards. By default, two or more USB 3.0 versions are located in the rear panel of the motherboard, some are mounted on the motherboard and at least two USBs are located on the front panel of the computer cabinet case. Even if you want an extra USB in active machine plug USB cable card. Or two or more cables with USB slots displaying the USB jack on the mainboard.
Connect audio cable – Nowadays all design motherboards are equipped with an inbuilt audio device chipset facility. But in the old days, computer development time required the sound card to be manually installed on each motherboard. Where the sound card produces sound, and you properly plug in all audio cables to the appropriate audio cable point.
Connect the 4 Pin CPU Connector – The 4 pin 12-volt power connector is specifically designed to supply power to the microprocessor. Where it plugs the 4 pin power connector into the 4 pin CPU power socket located on the motherboard. Here the CPU consumes all the power generated by the 4 pin CPU power connector.
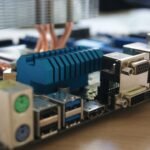
Install rear panel cable.
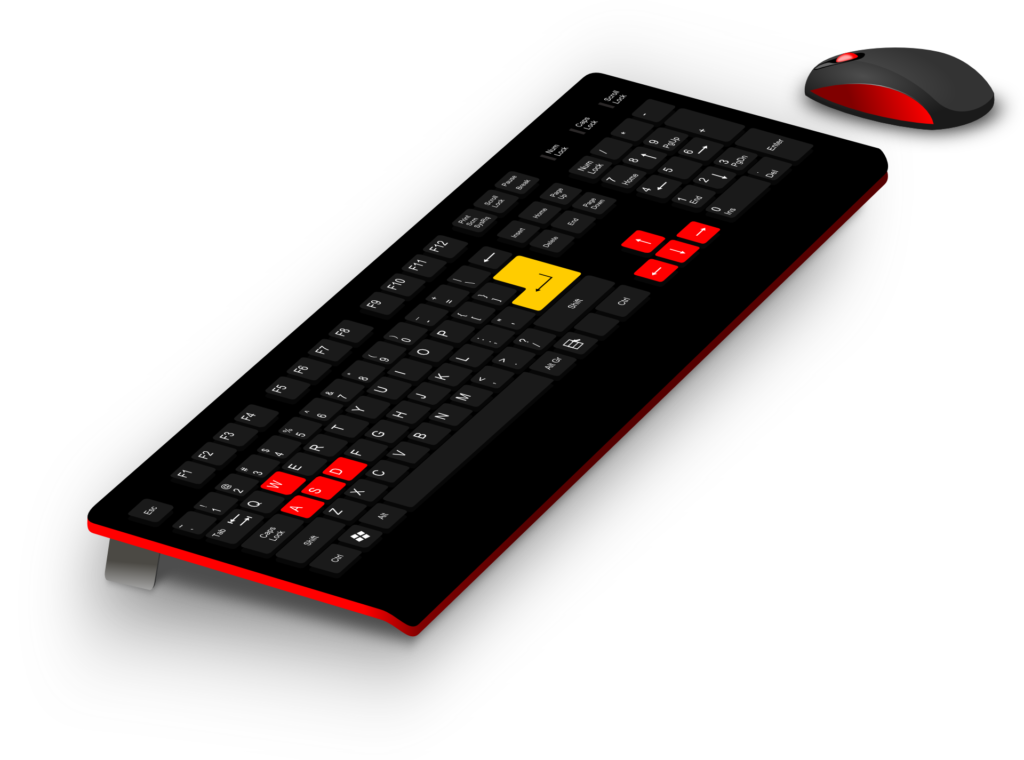
Keyboard Installation – A keyboard is a popular input device for using alphanumeric and text to input in any computer electronics application software. Where you manually connect the keyboard to the rear panel of the computer motherboard. The default color set purple plugin for the keyboard is 6 pin keyboard connector, and now start checking keyboard installation in your computer and type any key. Here, if everything is properly input in the keyboard, it means that the installation of the keyboard in the computer system is in proper order.
Mouse Installation – Mouse is a very essential input pointing device. Which enables a computer user to control computer instructions, windows, dialogs, and operate existing open windows. The default color set for the mouse PS/2 port is green, manually install the mouse into the 6 pin mouse cable on the back of the mouse.
Check the installation status of the Optical Drive/DVD ROM, Mouse, Start the computer. You can even check the left, right, and scroll bar buttons of mouse movement, and finalize the installation process of mouse installation.
LCD Installation – LCD monitor installation in a personal computer involves installing two separate ports. Here one is the power code that plugs into the monitor and acts as the power supply, the other is the VGA cable, which is plugged in between the LCD VGA connector and the motherboard rear connector. Where both of these ports are installed correctly, and now you start the computer, here you see the display resolution of the computer screen or the desktop window, and finalize the stage of LCD installation.
Printer Installation – The printer is a popular output device. which are manually attached to a single or modern computer. Where if you want to install a printer with an active computer. So you buy a new printer, open the printer, install the cable in the LPT to the printer LPT/USB port on the existing motherboard, or install the printer software installed by the printer manufacturer into the USB rear panel port. Here you follow the printer hardware-software instructions exactly and wait until the printer installation is successful. Finally, you print test page verifies the installation of the printer process. Verify that your printer’s hardware installation process was successful.
Scanner Installation – The scanner is another required input hardware device. Which is used to scan documents, graphics, materials, images, images, and other paper electronics document materials. Where you plug the scanner cable into the rear cabinet panel. Now install the scanner version driver along with scanning any electronics material and check and finalize the scanner installation process.
Detach Different Parts of PC – Detach PC The different parts option involves the process of manually disassembling all the computer hardware parts one by one. But here you must have the skill to disassemble the computer hardware properly, otherwise, it will seriously cause the system to not have proper booting function. Here I will detail how the PC component is taken apart step by step.
How to dis-assemble pc parts step by step personal computer.
- First, you must disconnect all computer power plugs from the main power supply.
- Now properly detach the LCD/LED monitor wires namely the power cable and VGA cable that is connected to the cabinet.
- Here you see several cabinet ports on the back panel of the cabinet. Here you manually unplug the mouse, keyboard, VGA port, audio jack, HDMI port, games, printer, USB port, Ethernet port, video, and all sorts of other ports.
- Now open the cabinet case front view on the motherboard, unscrew all the motherboard mounting hole screws from all sides.
- That’s how you unplug the SMPS main 24 pin power connector. Even you manually disconnect the 12-volt 4 pin power connector from the motherboard.
- Now that you barely pull the motherboard out of the computer cabinet, you’ve uninstalled all installed USB ports, HDMI cards, Ethernet, or other card cables, unplugged the power panel connector, removed the RAM or CMOS Battery, SATA, and PATA cables, or connectors, etc., are removed.
- Finally, remove all connectors that you disconnected from the computer motherboard. Now it’s time to uninstall the computer heatsink fan, here you open it properly, now you see the bottom microprocessor chip move retention clip angle at a 90-degree angle to get the microprocessor out of its place. Even you properly put the microprocessor in its place.
- You now see that all components of your computer are properly unplugged or disconnected from the main computer component.
Startup Process (Booting) – The booting process involves a long series of system steps. Which works to load the operating system from secondary memory to primary memory (RAM). When you press the START button, the BIOS START COMPUTER function checks all internal/external hardware devices and components. This starts the search for bootable files in the boot sector. Where computer bootable instruction ROM is stored in secondary memory. Where the boot sector loads the bootable or bootable instructions, and starts the installed operating system. Now it starts the process of a manual post (power-on self-test) program. Which checks all computer peripherals. If everything’s done right. then it copies the boot instruction to RAM. Otherwise, if a device fails to load. So it generates console error. Even when we start and restart the computer in regular process. So it is an iterative process many times.
What are Bios – Bios is abbreviated as Basic Input-Output Computer System. Where it is the first computer program installed or loaded onto a computer by computer motherboard manufacturers. Where Bios contains all bootable instructions and computer programs code. which is essential for normal booting and proper computing function. Where each BIOS controls and coordinates the operation of all computer components and peripherals. Such as, keyboard, mouse, printer, scanner, USB, IRQ, Ethernet, RAM, serial and parallel com PS/2 ports, components of computer security features enable and disable various options and many other functions required for normal booting computer systems. Where Bios is the computer hardware software that controls and manages the Windows operation. Here the bios are stored only in the read-only memory (permanent memory). And every time the computer starts, it moves the operating system bootable instruction from RAM to ROM. Remember, the BIOS is always the first program that comes pre-installed in that computer’s motherboard area. When the computer motherboard company makes the design. Here after you have configured the proper bios menu, it is now time to install the windows operating system to the boot graphically gui operating system environment. Where you can also update the old bios version to new after getting detailed information about the bios up-gradation process. But here if you have less skill about computer hardware technology. So don’t try it, else it may permanently damage your computer hardware. So, always be careful before applying these steps.
Bios Setup – Bios Setup means that you can enter the Bios Screen. You have several keyboard keys and options to access the Bios menu screen. Where some computers allow you to press the Del key. When you switch the computer on some laptop. So you manually press and hold the F2, F10, TAB keys. Now you can see the bios screen window, the bios screen display multiple bios screens. computer components that are required to function properly. Remember, if you are a beginner, don’t change the bios function and menu. Otherwise, it interrupts the booting process and other bios services, even it can cause bios damage.
Related posts
 Computer Motherboard and its Components.
 Computer Motherboard Slot and All Types of External Cards.
 Computer Motherboard Ports And Cable Type.
 About Microprocessors Cpu.
 Pc assembly and its operation Hindi.
 Microsoft Windows Legacy Operating system.
 Everything About Microsoft Windows 10.
 About Computer Memory.
 About Libre office.
 Input And Output Device.
 Computer Motherboard Slots and All Type of External Cards In Hindi.
 Computer Motherboard and its Components in Hindi.
 About Microsoft office 2016
 About Microsoft Windows 7.
 About Microsoft Office 2013 Pro Plus.
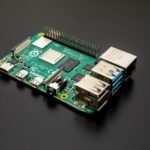 About Raspberry pi board
 About Microprocessors Cpu in Hindi.
 Computer Fundamental.
 Apache Open Office.
 Linux, What is Linux, A Complete Overview of Ubuntu Linux.
 About Arduino Microcontroller Board
 About ReactJs Framework
 About Microsoft Windows 8.
 About Assembly Programming
 About Python Tableau
 Type of Computer or Internet Network.
 Microsoft Windows Legacy Operating System Hindi.
 What Is Tailwind Css
 About Microsoft Windows 11 Operating system.
 About Microsoft Office 2013 Pro Plus Hindi.
 About Vue.js
 About Microsoft office 2016 Hindi
 About Machine Language
 Learn Java Programming
 Computer Motherboard Cable And Port Type In Hindi.
 Polynomials Class 10th
 What Is Bulma Css
 What Is Bootstrap Css
 Everything About Microsoft Windows 10 Hindi.
 Learn Html5
 Microsoft Windows 10 Operating System Apps.
 What is Nodejs
 About Postgresql
बहुपद कक्षा 10 (Polynomial Class 10th)
About Postgresql
बहुपद कक्षा 10 (Polynomial Class 10th)
 About Scipy Python Library
 Microsoft Windows 8 Apps.
 About mysql
 About MongoDb Database
 About Libre office In Hindi.
 About Delphi Programming
 Learn Html
 Trigonometry Class 10th
 त्रिकोणमिति कक्षा 10 (The Trigonometry Class 10th)
 About Scala Programming
 Learn C Programming
 About Joomla Cms
 Learn Java Script Programming
 Mouse and Keyboard Operations.
 About Magento Programming
 बहुपदों पर संक्रियाएँ कक्षा 10 (Operation on Polynomial Class 10th)
 About Pl/Sql
 About Microsoft office 365.
 About Python Numpy
 Sets Class 11th
 Triangle and its Properties Class 10th
 त्रिभुज और इसके गुण कक्षा 10 (The Triangle and its Properties Class 10th)
 About Json json javascript object notation
 About Xml
 Coordinate Geometry (Analytical Geometry) Class 10th
निर्देशांक ज्यामिति कक्षा 10 (The Coordinate Geometry Class 10th)
Coordinate Geometry (Analytical Geometry) Class 10th
निर्देशांक ज्यामिति कक्षा 10 (The Coordinate Geometry Class 10th)
 About Microsoft Windows 7 Hindi.
 What Is The Internet?
 Microsoft Sql Server
 Arithmetic Progression Class 10th
 About Pandas
 What is Linux, A Complete Overview of Ubuntu Linux Hindi.
 About Microsoft windows 11 Hindi.
 About Computer Memory Hindi.
 About Asp.net
 समान्तर श्रेढ़ी कक्षा 10 (Arithmetic Progressions Class 10th)
 About C# Programming
 What is Angular Js
 Types of Network Communication Media And Network Topology.
 About Kotlin Programming
 About Perl Programming
 HTML Document Structure
 Quadratic Equation Class 10th
 About Typescript Language
 Input And Output Devices in Hindi.
 Start With C Programming.
द्विघात समीकरण कक्षा 10 (Quadratic Equations Class 10th)
Start With C Programming.
द्विघात समीकरण कक्षा 10 (Quadratic Equations Class 10th)
 What Is Jquery/javascript query
 What Is Express.js
 About Microsoft Windows 8.1 Hindi.
 Polynomials Class 9th
 What Is A Search Engine and Their Type?
 C language Algorithms, Flowchart, and Terms.
 Heron’s Formula Class 9th
हीरोन का सूत्र कक्षा 9 (Heron’s Formula Class 9th)
Heron’s Formula Class 9th
हीरोन का सूत्र कक्षा 9 (Heron’s Formula Class 9th)
 Geometrical (Graphical) Meaning of the Zeroes of a Polynomial Class 10th
 बहुपद के शून्यकों का ज्यामितीय (आलेखीय) अर्थ कक्षा 10 [Geometrical (Graphical) Meaning of the Zeroes of the Polynomial Class 10th]
 About Visual Basic.net
 About Go Programming Language
 What Is Differential Calculus? Its Definition, Rules, and Examples
 About Sql – Structure Query Language
 HTML Document Structure In Hindi
 About Objective C Programming
 Operations on Real Numbers Class 9th
 Microsoft Windows Q&A Sections.
 An In-Depth Review of imagestotext.io in 2023
 Sum of First n Terms of an Arithmetic Progression Class 10th
 समान्तर श्रेढ़ी के पहले n पदों का योग कक्षा 10 (Sum of n Terms of Arithmetic Progression Class 10th)
 Perimeter and Area Class 6th
परिमाप और क्षेत्रफल कक्षा 6 (Perimeter and Area for Class 6th)
Perimeter and Area Class 6th
परिमाप और क्षेत्रफल कक्षा 6 (Perimeter and Area for Class 6th)
 समुच्चय कक्षा 11 (The Sets Class 11th)
 Microsoft Windows 10 Apps Hindi.
 वास्तविक संख्याओं पर संक्रियाएँ कक्षा 9वीं (Operations on Real Numbers Class 9th)
 About R Programming Language
 The Fundamental Theorem of Arithmetic Class 10th
 Apache Open Office Hindi.
 Decimal Expansion of Rational Numbers Class 10th
 Type of Computer Programming.
 Internet Technology And Network Protocols.
 Linear Equations in Two Variables Class 9th
 Decimal Numbers Class 7th
 Coordinate Geometry Class 9th
 nth Term (General Term) of an Arithmetic Progression Class 10th
 Section Formula Class 10th
 समान्तर श्रेढ़ी का n वाँ पद (व्यापक पद) कक्षा 10 (nth Term of Arithmetic Progression Class 10th)
 विभाजन सूत्र कक्षा 10 (The Section Formula Class 10th)
 Tangent and Secant of Circle Class 10th
 वृत्त की स्पर्श रेखा और छेदक रेखा कक्षा 10 (Tangent and Secant of Circles Class 10th)
 दशमलव संख्याएँ कक्षा 7 (Decimal Number Class 7th)
 निर्देशांक ज्यामिति कक्षा 9 (The Coordinate Geometry Class 9th)
 Microsoft Windows 8 Apps Hindi.
 What Is A Search Engine and Their Type In Hindi?
 Introduction to Euclid’s Geometry Class 9th
 यूक्लिड की ज्यामिति का परिचय कक्षा 9 (Introduction to Euclid’s Geometry Class 9th)
 About Ruby Programming
 About Wps Office.
 Fractions Class 7th
 Type of Computer or Internet Network In Hindi.
 वृत्त और इसके भाग कक्षा 10 (Circle and its Parts Class 10th)
 About Dart Programming
 Distance Between Two Points in Cartesian Plane and Distance Formula Class 10th
 Operations on Polynomials Class 10th
 Integers Class 6th
 Whole Numbers Class 6th
 दो चरों वाले रैखिक समीकरण कक्षा 9 (Linear Equations of two Variables Class 9th)


I appreciate your post. I liked reading the content you provided. I hope your website continues to publish content like these. Thank You!
You’ve written it so well, and you have some really good ideas. This post is outstanding!
Thank you for giving me important information about assemble PC. I also have some information to assemble this PC.. This is also useful for you.
Quality articles is the main to be a focus for the viewers to visit the site, that’s what this site is providing.