What is Arduinos Microcontroller
An open-source microcontroller board is an Arduino. Users who can construct and manage electronic projects thanks to computer programmers. Since its first release in 2005, Arduino Electronic Science Student has become growing in popularity by professionals, students, and enthusiasts alike.
Atmel AVR microcontrollers provide the foundation for Arduinos. Additionally, arduino boards and microcontrollers are available in a broad range of shapes and sizes, from the compact Arduino Nano to the robust Arduino Mega. The Arduino Integrated Development Environment (IDE) program may be used to program these. Which is a graphical software platform that enables users to design program, build them, change them, and upload them to Arduino boards.
From straightforward tasks like sensor reading and LED flashing to more complicated ones like robotics and home automation, Arduino microcontroller boards may be used for a broad variety of projects or software programming. They are often used in educational settings as a tool for instructing students in electronics and arduino programming.
The open-source nature of Arduino microcontroller technology is one of its distinguishing characteristics. Therefore, anybody may use and change the hardware design and software code without restriction. There is a sizable and vibrant user community for Arduino. We exchange several ideas for brand-new Arduino projects as well as information about developing code. With the help of these group communities, Arduinos, it is now simple to locate and support resources for learning Arduino microcontroller and developing Arduino apps.
The microcontroller on the Arduino board is also comparatively simple to operate. Even for those who are just starting out and have no prior knowledge with electronics or programming. The board has a range of inputs and outputs, and the Arduino IDE contains a condensed programming language based on c and C++. This can be simply programmed or linked to sensors, motors, and other electrical components.
The affordability of Arduino microcontroller boards is another benefit. While development boards and microcontrollers with greater power might be rather pricey. Simple Arduinos may be purchased for a reasonable price and are widely distributed. So, enabling them to be used by a variety of people.
Despite the Arduino microcontroller board’s accessibility and simplicity, it can also run more complicated projects. Arduino boards, for instance, may be used to automate industrial procedures and manage large-scale business premises. Additionally, a lot of businesses utilize Arduino technology as a prototype device to create new goods.
What is Arduino ide
The software platform for creating Arduino-based development programs is called the Arduino IDE (Integrated Development Environment). Arduino program code is written using the Arduino IDE, which is also used to build and upload program code to Arduino boards. A graphical user interface (GUI) setting is the Arduino IDE. This makes it easier for the Arduino developer or programmer to program the Arduino board and enables users to create and test Arduino code without the need for expensive hardware or tools.
The GUI application program Arduino IDE is open-source and free to use. Which works with the Linux, Mac OS X, and Windows operating systems. The Arduino IDE includes a text editor for writing and modifying code. A tool for converting Arduino code to machine language. And a bootloader that enables the Arduino board to upload and run code.
An additional library of pre-written code known as “sketches” is available in the Arduino IDE. Which customers may utilize to begin their own projects. The user programmer’s specific demands can be met by quickly modifying and totally customizing these designs.
The Arduino IDE software has been created with programmers in mind. Even for newcomers with minimal prior programming knowledge, the Arduino IDE interface is straightforward and user-friendly. This offers features like ardunio code auto-completion and ardunio syntax highlighting. Can facilitate writing and editing code for beginner Arduino programmers. The Arduino IDE also offers helpful debugging tools and error warnings. This aids users in locating and resolving any potential issues.
What is Arduino uno
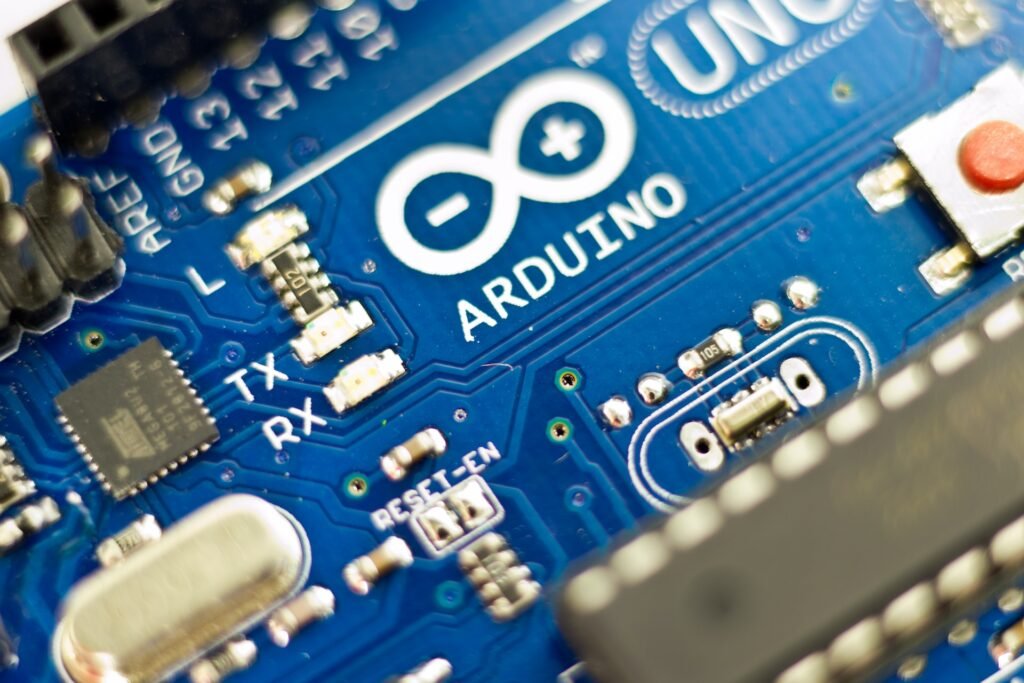
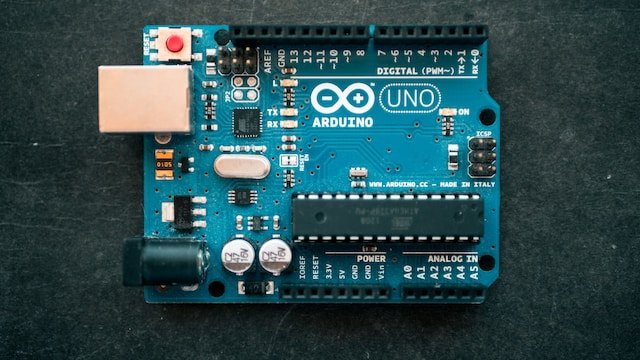
Popular Arduino Uno boards are built on the atmega328p microprocessor. Which is the board’s thinking. It is one of the most popular Arduino micro controller boards, and a range of Arduino applications are frequently created using it by hobbyists, Arduino teachers, and Arduino developers.
14 digital input/output pins, 6 analogue inputs, a 16 mhz quartz crystal, a USB port for programming and power, and an ICSP header for programming with an external programmer are all included in the Arduino Uno board. A reset button, an LED attached to pin 13, and a power jack are further features of the board.
The Arduino Uno’s digital pins may be set up as inputs or outputs. As a result, they may be utilized to operate motors, leds, and other electrical devices. The sensor’s data may be read via the analogue input. Potentiometers, light sensors, temperature sensors, and other devices are managed and programmed.
Create Projects with Arduino
Simple LED blinkers to complex robotics and automation systems may all be built using the Arduinos board micro controller, a well-liked tool or hardware board. The projects listed below are only a few examples. Which Arduinos may be used to create.
The Internet of Things (iot) may be used to control lights, appliances, and other household equipment using an Arduino-based home automation system. Using a smartphone app or voice commands with virtual assistant software like Alexa or Google Assistant, you may operate your computer system.
Data on temperature, humidity, air pressure, and other environmental factors may be gathered and analyzed using an Arduino-based weather station. The information and data gathered may be shown on the screen or transferred via iot to the internet for remote monitoring.
The robot car can be designed to drive and navigate using sensors and motors and is powered by an Arduino-based micro controller. The vehicle may be driven manually or with the help of a remote control.
A grid of leds may be used in an Arduino-based LED cube to show patterns, interactive lights, and animations. Custom patterns and light colors may be shown on the Cube by programming.
For optimal plant development, a smart garden system built on an Arduino microcontroller can track soil moisture, temperature, and light levels. For the best growth circumstances, the device can automatically water plants and change the illumination.
How to Arduino software download
You must perform the following actions in order to download the Arduino IDE software.
- Visit the official Arduino website at www.arduino.cc first.
- Select the “Software” tab from the menu bar now.
- Select the “Download Arduino IDE” button at this time.
- Choose the correct arduino software version for your operating system (Windows, Mac OS X, or Linux).
- To begin the download, click the “Download” button now.
- Following the instructions provided in the installation wizard, you may install the ardunio program on your computer when the download is finished.
What is in Arduino kit
A collection of hardware parts and software programs make up an Arduino kit. It aims to facilitate the beginning of projects using the Arduino platform for developers or users. These Arduino kits often come with an Arduino microcontroller board, a variety of sensors, actuators, and other electrical parts, as well as documentation, tutorials, and code examples for the Arduino microcontroller platform.
In order to meet the needs of users with different levels of ardunio experience and interests, Arduino kits are available in a broad range of configurations and price points. Some kits for arduino microcontrollers are aimed at novices. And while some merely have basic components, others include sophisticated sensors and actuators for more complicated designs.
In addition to the official Arduino website, you may get your Arduino kit from a number of different online merchants. To assist consumers in getting started, many kits provide thorough instructions and tutorials. Some even provide online forums and communities. Where users may interact with other Arduino users in these groups and share their work.
Types of Arduino uno pins
There is a total of 20 input/output (I/O) pins on the Arduino Uno board. It has a variety of applications.
- Digital Pins 0–13 – These pins are input and output compatible. They can be used to deliver digital signals to operate leds, motors, and other electrical components, as well as to read digital signals from sensors or other devices.
- Analogue Pins A0-A5 – You may read analogue signals from the sensor using these pins. They are also capable of serving as digital pins, just as potentiometers, light sensors, and temperature sensors.
- PWM Pins – The PWM (pulse-width modulation) pins 3, 5, 6, 9, 10, and 11 can produce signals. These pins can be used to regulate motor speed or LED brightness.
- Interrupt Pins – Pins 2 and 3 are interrupt pins that can be used. As a result, the Arduino can respond to outside events speedily.
- Reset Pin – You can enter bootloader mode for programming or reset the board using the reset pin.
- The 5 volt – power supply and ground connections are provided by the 5V and GND pins, respectively.
What type of Arduino board available
A lightweight, programmable microcontroller computer board is known as an Arduino microcontroller board. This may be utilized to manage electrical parts and equipment. Microcontrollers are the foundation of Arduino boards. Which are little integrated circuits that may be programmed to carry out certain functions.
The Arduino Uno board is the most popular Arduino model. It features a 16 mhz Atmel AVR microprocessor, 32 KB of storage space for flash memory, and 2 KB for RAM. Additionally, the Uno incorporates a USB connector for power and programming. Additionally, there are several input/output pins that may be utilized to manage electrical parts like leds, motors, and sensors.
The Mega, Due, Nano, and Micro Arduino microcontroller boards are more varieties of Arduino boards. Each of which has unique capabilities and characteristics. A few Arduino microcontroller boards are intended for certain uses. To connect to the internet and execute Linux-based programs, or for networking applications like Arduino Ethernet.
Starter kit for Arduino project
A package contains an Arduino starting kit. Contains all the information you need to get started on Arduino programming projects. Typically, these Arduino kits come with an Arduino board, as well as sensors, actuators, and other electronic parts. In addition to full documentation and Arduino tutorials to assist you in starting your projects.
Here are a few of the parts that Arduino starter kits often contain.
- The Arduino Board – The board itself is the most crucial element of any Arduino kit. The most frequent board included in beginner packages is the Arduino Uno. But there are also additional boards, such Nano and Mega.
- Sensors – Starter kits frequently come with a variety of sensors. You may interact with the physical world with sensors like temperature, light, and motion detectors.
- Actuators – In addition to these, kits may also contain motors, servos, and other actuators. Which enable you to manage tangible objects.
- Breadboard and jumper wires – Using these parts, you can connect and prototype circuits on a breadboard without using solder.
- Resistors and leds – These parts are necessary for creating simple circuits and learning about electronics.
- LCD Screen – An LCD screen could be included in certain packages. It enables the display of text and images.
- Battery and Power Supply – Some kits may come with a battery and power supply, enabling you to run your projects without having to plug them into an outlet.
What is Arduino software
The Integrated Development Environment (IDE) for Arduino is software. It is an application of open-source, free software. It may be used to program Arduino boards, build Arduino code, and use the ardunio programming language. The uploading process uses the code. For Windows, Mac, and Linux operating systems, it may be downloaded.
A text editor for creating code, a compiler for turning Arduino code into a machine-readable format, and an uploader for uploading code to the Arduino board are all included in the Arduino software. A serial monitor is further included. This enables you to interact with the board and see information transmitted by sensors and other devices.
The simplicity and use of the Arduino software are two of its standout qualities. A lot of built-in libraries and functions are present in the program. This make it simple to begin programming, even if you have no prior knowledge with ardunio programming. The software also comes with a number of tutorials and example programs to assist you get started on your projects.
What is Arduino programming
First, use a USB cord to connect the Arduino board to your computer, then start the Arduino IDE program.
- Utilize the software’s text editor to create your Arduino program code using the Arduino programming language. Functions, loops, and conditional expressions can all be used in your program. May also contain instructions to read sensor inputs and regulate actuator outputs.
- Compile your program to create code that can be read by computers. Which an Arduino board can run. This stage examines your program for syntax mistakes and other issues that could prevent it from functioning properly.
- Using the software’s included uploader tool, upload your program to the Arduino board. In this phase, the compiled code is delivered to the board’s microcontroller for execution.
- Test your program by attaching the sensors and actuators to the correct Arduino board pins, and make sure it functions as intended.
- Up till the necessary program output functionality is attained. Repeat steps 3 through 5 while making code modifications as you iterate over your program.
Explain Arduino uno r3
Popular Arduino Uno R3 boards are built on the atmega328p microprocessor. It is the replacement for the original Arduino Uno board and comes with a number of enhancements and upgrades.
The Arduino Uno R3 has a few essential characteristics that are listed below.
- Microprocessor – The Uno R3’s atmega328p microprocessor includes 32 KB of flash memory for storing programs, 2 KB of SRAM for data storage, and 1 KB of EEPROM for non-volatile storage.
- Digital I/O – The board contains 14 digital input/output pins for I/O. There are 6 analogue input pins and 6 PWM output pins total.
- Power – The Uno R3 may be supplied with electricity either externally or via USB. It has a voltage regulator built in that enables it to accept an input voltage ranging from 7 to 12 volts.
- Communication – For serial connection with a computer, the board has a USB interface. It also has UART and I2C interfaces for communicating with other devices.
- Programming – The Arduino software may be used to programming the Uno R3. On which the Wiring programming language is based.
How to connect Arduino with Bluetooth device
Bluetooth modules make it simple to link Arduino boards. This makes it possible to wirelessly communicate with other gadgets like computers, tablets, and smartphones. This enables wireless sensor data collection and remote control of your Arduino project.
A Bluetooth module is required in order to use Bluetooth with an Arduino board. It is SPP (Serial Port Profile) compatible. The HC-05 and HC-06 are only two of the Bluetooth modules that are compatible with Arduino.
Here are the fundamental steps for connecting a Bluetooth device to an Arduino board.
- Join the Arduino board and Bluetooth module first. The TX pin of the module has to be connected to the TX pin of the Arduino, and the RX pin of the module needs to be connected to the TX pin of the Arduino. Additionally, the module will need connectors for power and ground.
- Send an Arduino board a program to upload. This establishes a serial communication channel on the board’s two digital pins using the Software Serial library. This prevents the USB serial port used to upload code from interfering with the Bluetooth module’s communication with the Arduino board.
- Connect your Bluetooth module to the target gadget. The typical procedure for doing this with the device you wish to interact with, such as a smartphone or tablet, is to put the module into pairing mode and search for it there.
- After pairing the bluetooth module. Therefore, you may use the Bluetooth Terminal app on your device to communicate with the Arduino board remotely by sending and receiving commands.
- Create code for the Arduino board that will allow it to receive data from the Bluetooth module and react appropriately.
Arduino projects for beginners Arduino programmer
Several easy and entertaining Arduino projects may be found here. Which are ideal for newcomers.
- LED Blink – is a well-known Arduino project. This switches an LED on and off. You will learn the fundamentals of programming and digital output with this easy project.
- Button Controlled LED – In this project, an LED’s on/off status is controlled by a button. Learning about digital inputs and outputs is made very easy with this.
- Light Sensor – To measure the quantity of light in a space, this project makes use of a light sensor. It appropriately modifies an LED’s brightness. This provides a useful overview of analogue inputs and outputs.
- Temperature Sensor – This project measures the room’s temperature using a temperature sensor. And shows it on the LCD panel. It’s an effective method for learning how to work with analogue inputs, outputs, and sensors.
- Music with a Buzzer – In this project, you play basic melodies on the Arduino board using a piezo buzzer to generate simple rhythms. It’s a fun method to learn how to use Arduino to create noises.
- RGB leds – To produce the various colors in this project, RGB leds are used. The three potentiometers may be used to change the color of the leds. Learn more about analogue inputs and outputs by doing this.
- Servo Motor Control – In this project, a servo motor is used to control how an object moves. The potentiometer may be used to control the servo motor’s position. It’s a useful method for learning how to use Arduino to control motors.
What is Arduino cc
The official webpage for the Arduino project is at Arduino.cc. It is an open-source hardware and software platform for electronics that is simple to use. The website acts as a central location for all things Arduino-related. Including guides, forums, and a shop where you can purchase authorized Arduino boards and accessories.
You can discover a tonne of information on the Arduino.cc website to assist you in getting started with Arduino. Getting started manuals, reference materials for the Arduino programming language, and an extensive user community exchanging information and projects. Access to the Arduino software is also made available via the website. A program known as the Arduino IDE. Which you may start programming your Arduino boards with by downloading for free.
The Arduino.cc website offers materials for newcomers as well as knowledge on more complex subjects including advanced programming methods, hardware hacking, and interaction with other platforms and gadgets. In general, anyone interested in learning about and using the Arduino platform can visit the website Arduino.cc.
How to Arduino.cc download software
These steps explain how to get the Arduino software from the official Arduino.cc website.
- Go to the “Software” tab at the top of the page on the Arduino.cc website first.
- Choose the correct software version for the Windows, Mac, or Linux operating system that is installed on your machine.
- To obtain the most recent version of the program, click the download link.
- Open the downloaded file and follow the instructions to install the Arduino software when the software download is complete.
- Utilize a USB connection to link your Arduino board to your PC.
- Select the relevant board and serial port from the Tools menu of the open Arduino software.
- To upload your code to the Arduino board, write it in the editor box and then click the Upload button.
Related posts
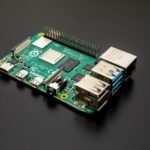 About Raspberry pi board
 About Microsoft office 2016
 About Microsoft Office 2013 Pro Plus.
 About Kotlin Programming
 About Scala Programming
 What Is Tailwind Css
 Learn C Programming
 About C# Programming
 About Libre office.
 About ReactJs Framework
 About Dart Programming
 Linux, What is Linux, A Complete Overview of Ubuntu Linux.
 About Objective C Programming
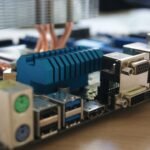
 Computer Motherboard and its Components.
 About Delphi Programming
 About Vue.js
 Everything About Microsoft Windows 10.
 About Typescript Language
 About Pl/Sql
 About Python Tableau
 Mouse and Keyboard Operations.
 Learn Java Script Programming
 Learn Java Programming
 Type of Computer Programming.
 Input And Output Device.
 What Is Bulma Css
 About Microsoft office 365.
 First Program In C Language.
 Type of Computer or Internet Network.
 What Is Bootstrap Css
 About Perl Programming
 About Microsoft Office 2013 Pro Plus Hindi.
 About Microsoft Windows 7.
 About Assembly Programming
 Polynomials Class 10th
बहुपद कक्षा 10 (Polynomial Class 10th)
Polynomials Class 10th
बहुपद कक्षा 10 (Polynomial Class 10th)
 C language Algorithms, Flowchart, and Terms.
 About mysql
 Computer Motherboard Ports And Cable Type.
 About Visual Basic.net
 Apache Open Office.
 About Microsoft office 2016 Hindi
 About Python Programming.
 Pc assembly and its operation.
 Learn Html5
 What Is C Programming.
 What is Nodejs
 Learn Html
 About Xml
 About Sql – Structure Query Language
 What Is Express.js
 About Ruby Programming
 About Json json javascript object notation
 Trigonometry Class 10th
 त्रिकोणमिति कक्षा 10 (The Trigonometry Class 10th)
 Start With C Programming.
 About R Programming Language
 About MongoDb Database
 About Go Programming Language
 About Postgresql
 What Is Jquery/javascript query
 About Scipy Python Library
 About Machine Language
 About Magento Programming
 About Pandas
 Everything About Microsoft Windows 10 Hindi.
 About Joomla Cms
 Microsoft Windows Legacy Operating system.
 About Asp.net
 About Libre office In Hindi.
 About Python Numpy
 First Program In C Language In Hindi.
 Microsoft Windows 10 Operating System Apps.
 Coordinate Geometry (Analytical Geometry) Class 10th
निर्देशांक ज्यामिति कक्षा 10 (The Coordinate Geometry Class 10th)
Coordinate Geometry (Analytical Geometry) Class 10th
निर्देशांक ज्यामिति कक्षा 10 (The Coordinate Geometry Class 10th)
 About Matlab Programming
 What Is The Internet?
 About Computer Memory.
 What is Angular Js
 Computer Fundamental.
 What Is A Search Engine and Their Type?
 Arithmetic Progression Class 10th
 समान्तर श्रेढ़ी कक्षा 10 (Arithmetic Progressions Class 10th)
 Pc assembly and its operation Hindi.
 Data Type In C Programming.
 About Wps Office.
 Computer Motherboard and its Components in Hindi.
 Microsoft Sql Server
 Quadratic Equation Class 10th
द्विघात समीकरण कक्षा 10 (Quadratic Equations Class 10th)
Quadratic Equation Class 10th
द्विघात समीकरण कक्षा 10 (Quadratic Equations Class 10th)
 What is Linux, A Complete Overview of Ubuntu Linux Hindi.
 Internet Network Services And Ftp Protocol.
 Type of Computer Programming in Hindi.
 About Python Programming In Hindi.
 Computer Motherboard Slot and All Types of External Cards.
 Triangle and its Properties Class 10th
 त्रिभुज और इसके गुण कक्षा 10 (The Triangle and its Properties Class 10th)
 Heron’s Formula Class 9th
 About Microsoft Windows 7 Hindi.
हीरोन का सूत्र कक्षा 9 (Heron’s Formula Class 9th)
About Microsoft Windows 7 Hindi.
हीरोन का सूत्र कक्षा 9 (Heron’s Formula Class 9th)
 Geometrical (Graphical) Meaning of the Zeroes of a Polynomial Class 10th
 बहुपद के शून्यकों का ज्यामितीय (आलेखीय) अर्थ कक्षा 10 [Geometrical (Graphical) Meaning of the Zeroes of the Polynomial Class 10th]
 Type of Variable In C Programming.
 HTML Elements
 Data Type In C Programming Hindi.
 Python Q&A Sections.
 Operations on Real Numbers Class 9th
 Microsoft Windows 10 Apps Hindi.
 Sum of First n Terms of an Arithmetic Progression Class 10th
 समान्तर श्रेढ़ी के पहले n पदों का योग कक्षा 10 (Sum of n Terms of Arithmetic Progression Class 10th)
 Perimeter and Area Class 6th
परिमाप और क्षेत्रफल कक्षा 6 (Perimeter and Area for Class 6th)
Perimeter and Area Class 6th
परिमाप और क्षेत्रफल कक्षा 6 (Perimeter and Area for Class 6th)
 Sets Class 11th
 समुच्चय कक्षा 11 (The Sets Class 11th)
 Microsoft Windows Legacy Operating System Hindi.
 वास्तविक संख्याओं पर संक्रियाएँ कक्षा 9वीं (Operations on Real Numbers Class 9th)
 Mouse and Keyboard Operations in Hindi.
 HTML Elements In Hindi
 Computer Motherboard Cable And Port Type In Hindi.
 HTML Document Structure
 Microsoft Windows 8 Apps.
 Coordinate Geometry Class 9th
 Introduction to Euclid’s Geometry Class 9th
 HTML Document Structure In Hindi
 nth Term (General Term) of an Arithmetic Progression Class 10th
 Section Formula Class 10th
 समान्तर श्रेढ़ी का n वाँ पद (व्यापक पद) कक्षा 10 (nth Term of Arithmetic Progression Class 10th)
 विभाजन सूत्र कक्षा 10 (The Section Formula Class 10th)
 Tangent and Secant of Circle Class 10th
 वृत्त की स्पर्श रेखा और छेदक रेखा कक्षा 10 (Tangent and Secant of Circles Class 10th)
 Decimal Numbers Class 7th
 दशमलव संख्याएँ कक्षा 7 (Decimal Number Class 7th)
 निर्देशांक ज्यामिति कक्षा 9 (The Coordinate Geometry Class 9th)
 Microsoft Windows 8 Apps Hindi.
 What Is A Search Engine and Their Type In Hindi?
 यूक्लिड की ज्यामिति का परिचय कक्षा 9 (Introduction to Euclid’s Geometry Class 9th)
 About Microsoft Windows 8.
 An In-Depth Review of imagestotext.io in 2023
 Apache Open Office Hindi.
 Pair of Linear Equations in Two Variables Class 10th
 Fractions Class 7th
 Polynomials Class 9th
 Operations on Polynomials Class 10th
 बहुपदों पर संक्रियाएँ कक्षा 10 (Operation on Polynomial Class 10th)
 Integers Class 6th
भिन्न संख्याएँ कक्षा 7 (Fraction Class 7th)
Integers Class 6th
भिन्न संख्याएँ कक्षा 7 (Fraction Class 7th)
 Whole Numbers Class 6th
 दो चर वाले रैखिक समीकरण युग्म कक्षा 10 (Pair of Linear Equations in Two Variables Class 10th)
 Linear Equations in Two Variables Class 9th
 Variance in Statistics: Definition, Formulas, Properties, and Examples